Showing posts with label photography. Show all posts

Thursday, May 30, 2013

Taking Great Pictures For Etsy Listings

Chainmail Hacky Sack from Tangled Metal

We've been discussing taking photos for Etsy. The photo, of course being the foundation on which your entire listing is built around. Looking at the above photo note that the Chainmail Hacky Sack is 100% in focus and the shoe is slightly out of focus. This is a somewhat artsy photo without being over the top or the background being distracting. This item has been in 37 Treasury Lists.

It was taken with a Canon Rebel DSLR camera. It was set to defocus the background. It was taken in a light box with lights that emulate outdoor lighting. Notice how the background is as white as the page. This almost gives the illusion of floating. This technique has been a tried and true staple of jewelry photography for many years.

If you had no idea what a Hacky Sack was you'd at least get a clue that it had something to do with a shoe or foot. The Converse shoe should give the idea that it is a trendy or hip thing and the colorfulness of the shoe shoes that it is not your ordinary past time.

As you can see, a lot of thought has gone into taking this one single photo. Now, I could have used a photo of several people playing Hacky Sack, but the focus would be on the people and the actual Hacky Sack would have been lost. Though, it would be a good idea to have a picture of people playing in your listing. Personally I would put that picture last in the listing.

The point is, your main photo should tell a story, evoke a feeling, give understanding of the product and be clear- at least have a clear focal point. It should convey what the item is, what it is for and still have a bit of an artsy nature to it. My photo may not be perfect and I am sure plenty of people could critique it to death, but for me and my listing it seems to do the job.

Wednesday, May 29, 2013

Creating Great Etsy Listings - Part 1 - The Perfect Photos

Lightbulb Airship By Tangled Metal

Creating the perfect listing for Etsy is the biggest challenge you can face for your shop. For me it starts with the perfect set of photos. Well, it actually starts when I create the item but that isn't what we are going to talk about today. Today we are talking about photography.

Chances are you are not a professional photographer. (If you are that is great!) The first image is always the hardest. You want to have an image that will represent your item and be somewhat artsy, especially if you want people to put it into a treasury. Just remember to try not to get too artsy. Your item should always be the focus of the pictures. If the customer has to guess what the product is by the image than you have done something wrong.

The four subsequent images should try and get the item from each direction and be clear and concise so that any question the customer has is answered. Remember, your customer cannot touch the item so they do not know how it feels. Of course some questions have to be answered in the description, but we'll get to that later in this series.

I personally like white backgrounds. Some people have good results with dark backgrounds. (Not me. I just cannot seem to make them work) Using props is acceptable, too, as long as they do not distract from the item. For small items a light box is about as necessary are it gets. You can pick one up on eBay or build your own from a cardboard box. I will work on a tutorial for you on how to build one soon.

Lighting is also very important. Remember that hard surfaces need soft light and soft surfaces need hard light. I will get more into this soon as well. Nothing is worse than a dark blurry photo with a lot of distracting props. Maybe that is why I am so fond of plain white backgrounds.

That is all for now. Sorry I wasn't around yesterday, I was getting over being really sick. I am much better now and back on schedule.

Friday, May 10, 2013

13 Tips And tricks To Increase Your Etsy Sales


From time to time we forget the obvious ways to spread the word about our shops. Here are a few Tips and Tricks to help you increase your sales on Etsy. Please feel free to add your Tips or Tricks to the comment section.

1. Make sure you have a link to your shop and all social media in the signature of your email. You'll be surprised at how many people will click on the link. Even friends and family will click and share your links.

2. Put a link to your shop or social media in your signature on message boards and forums. Be sure that you are active on the forum or message board and that you have permission to post links in your signature. (Join forums and boards that relate to your craft and be active)

3. QR codes are a great way to promote your shop offline. I wrote an article about How To Create QR Codes. Check it out, create your code then use it. I suggest using it to link over to your Facebook Page so that you keep that person. If you just link to your shop it may not be a lasting customer.

4. Offer rewards to all your customers. Whether it be a coupon code (my Coupon Code Article) or a free gift, when someone receives something special they will remember you.

5. Ask if you can add your customer to your newsletter mailing. When can you ask? I send out a convo when I ship items. I ask if it is okay to add them to my newsletter. It is hit and miss but I do gain about 50% of all customers that I ask. I also set up a sign up sheet when I am at shows.

6. Don't be afraid to advertise. Coke and Pepsi didn't get where they are today by sitting around waiting for sales. Weigh the pros and cons. If you cannot afford paid advertising there are tons of free options out there. Even if you can only set aside $25 a month for advertising you'll be shocked how much of a return you can get. I suggest Facebook advertising because once they become a "Liker" of your page you can put ads in front of them multiple time rather than a one time deal. (I have an eBook on how to use Facebook Ads for Etsy here)

7. Make sure people can find your products. Make sure you have plenty of solid usable key word and key word phrases. Ask your friends or your mom how they would search for your product. This will help you figure out your key words. Etsy calls these Tags.

8. Make sure your description is descriptive. You can have some fun stories or statements but be sure your descriptions accurately describe your product. Try to go through all your senses. Does the item have a certain feel to it? how does it make you feel emotionally to wear or use it? Does smell or hearing play a roll? Your customer cannot touch your product before they buy, try and make it so they do not feel they have to.

9. Titles are super important. Bland titles generally do not do as well as cute and fun titles. Just make sure your title makes sense. If someone reads it on Google is it going to make them want to click through? If you Tweet from Etsy does the title make sense?

10. Photos are everything. One good photo is far better than five bad fussy dark ones. Try to take pictures from as many angles as you can so the customer can see what it looks like from every angle  Remember they cannot touch it so you have to make them feel like they have. (I have several Photography Articles here)

11. Selling on Etsy is a job. The more you put into your job the better it will be. Take time to read everything you can including the Etsy Sellers Handbook. Etsy produces it for a reason- it works. Read the Etsy Blog too. Tons of great info is in there all the time.

12. Schedule your time and stick to it. If you have not posted something on the Etsy forums, rewrote a Title or Description, Taken a better photo, listed a new item or renewed something today you have not been doing your job. You need to try and do something every single day.

13. Never Give Up - Never Surrender! If what you are doing isn't working, try something else. If that doesn't work, try something different again! The beauty of Etsy is you can fine tune things and test them multiple time. Once you find something that works, keep doing it until it doesn't work anymore. Things change you have to constantly keep up with new trends and the like.

That is it for today. I hope these tips help you. Please feel free to share this with anyone you know on Etsy and get their feedback. As always if you have questions please send them my way and I will try my best to answer them. MarketMyShop@gmail.com

Tuesday, March 5, 2013

7 Tips To Spice Up Your Etsy Shop


I know today was supposed to be my First Tuesday Shop Review but time got the better of me and I am not prepared to publish that post until next week. So, here are some tips on how to spice up your Etsy shop. Enjoy!

1. Run A Sale - Running a sale can provide a quick boost to your views and even your sales. Unusual sales seem to catch people's attention better. Try having a Summer Blowout sale in the middle of winter or a Christmas in July sale. Make it outrageous!

2. Change Your Photo Order -  Hopefully by now you have all five of your photos looking great! Rotate them around so that your first photo doesn't get stale. This will also help you find out what type of photo works best for your products.

3. Renew Your Items - Don't just renew your best selling items. Renew some of the items that aren't selling. Bring those items to the front of your shop and mix them into your best sellers! This works wonders if you have a lot of items for sale!

4. Change Your Banner - I am not saying go out and buy a new banner design every week. I am just saying change it up a little! Add hears to it for Valentines Day, a 4 leaf clover for St Patrick's Day, etc. Keep your theme but make it reflect seasonal changes and Holidays and special events.

5. Change Up Your Shop Announcement - Don't let your shop announcement get stale. I am not suggesting using it for a blog. Changing your shop announcement also gives the search engines an indication that your page is active.

6. Rearrange Your Shop - Make sure you set your shop so that it defaults to your rearranged view. Try to put a representation of all that you do on page one of your shop. You can then set up the other pages how ever you like. I suggest a mixture of items with similar themes such as colors or shapes. There is no need to put all of the like items together on the same page, that is what your sections are for.

7. Don't Be Afraid To Try New Things - If something doesn't seem to be working, try something else! I usually try something for 3 days to a week to give it a fair chance. Photos are a good example. Every item does not need to be photographed from the same angle! Try strange angles that make people want to look closer.

That is all for today. If you have some ideas you'd like to add to this list please feel free to leave a comment.

Wednesday, February 6, 2013

Etsy Shop Photo Tips


As some of you may know, from time to time I am asked to critique a shop. Yes, sometimes I actually have the time to do so. Most of the time I just simply cannot do it. Recently however I was asked to look at shop and I had time to do it. I will not go into a lot of details, let's just say the shop had been open for a couple of years and needed SERIOUS help. After two years the shop only had 10 sales.

What did I attribute the lack of sales to? Well first off let me just say that every one of the pictures in slot #1 were decent. A little washed out from lightning them in photo editing software but they were not blurry or cropped poorly or anything like that. Without a $2500+ camera you'll never get the crisp clean photos like you see in magazines. However, even with a $150 to $500 camera you can get some decent shots.

Back to the story. So, the first image was decent but the other images were horrible. They were not cropped, they were not color corrected and there was no white on the white background. They were dark and uninviting. I just did not understand why the first image was decent and all the other images looked like... well... crap. So I asked the person why were the other images so terrible? (Of course I have a little more tact than that- not much but some) And they said it took too much time!

Now, all of my photos are far from perfect. I started out with a $75 camera and only recently upgraded to a $200 camera. I have a lot of photos to retake with the new camera. It is an ongoing process. By the time I get the rest of the photos re-shot with the new camera I hopefully will have saved up enough $$$ to purchase a $500 camera and it will all start again. In the meantime I use a few tips I picked up along the way and I would like to share them with you.

1. You have 5 slots for pictures. If you can take 5 photos from 5 different viewpoints use all 5 slots. If you cannot, then have at least 3 of the 5 slots filled. (If you are on ArtFire you have 10 slots.) More is better because your customers cannot touch your product.

2. Use hard light on soft items and soft light on hard items. That means if you are taking photos of crocheted items you can use direct light- Sunlight being the best. If you are taking pictures of things with reflective surfaces you should use indirect light. Use light through something like cloth or light diffusers.

3. Use a light box. (I have some other articles on light boxes. Just check out the tag cloud to the right for more info on that.) I found a light box on eBay for $30 and it works just fine. It is 16x16 but they come in sizes up to 48x48 (Of course the cost goes up a lot the bigger you buy) And there are instructions all over the internet on how to build a light box.

4. Read your camera's manual. I am not kidding, do it! When you are done with the manual get online and look up tutorials for your camera. Seriously folks point and shoot does not mean don't read up on how!

5. Invest in a photo editing program. The best on the market is probably Photo Shop. There are some inexpensive versions of it but it is still going to cost you some money. It is money well spent. There are also some free programs out there that will do the same things as Photo Shop. The learning curve on them is the investment. Gimp is a great program and will do everything that the more expensive ones will do.

The point is, there is no reason for your photos to look like you took them with your smart phone. The amount of money you invest into a decent camera and editing software will come back to you with your increase in sales. Yes, it takes time to get it right but it is worth getting right!


Monday, January 21, 2013

Etsy Photography Tip


I had a couple of set backs last week that did not allow me to blog. Hopefully, no more set backs for this week. One of the things I did with my second shop was pay close attention to how my photos looked. Etsy recently added a feature that makes things very helpful on how people see your product initially. Remember, you never get a second chance to make a first impression.

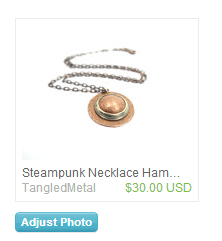
Sometimes when taking photos it is better to take an overall view of the item. Some cameras do not do closeups well. (Some photographers do not take closeups well.) Etsy's Crop Photo tool really helps to change the focus of your initial image. After you get to the Preview section of the listing page, in the top righthand corner you'll see something that looks like this:

Here you just click on the adjust photo button.


That will bring up the small slider on the left. This magnifies the photo.


Then once you have it the size you like you can drag the photo around until you have it centered like you want it. Then hit the Crop button.


That is all you have to do!


Adjusting the photo only changes it in the initial view. Once someone clicks on the listing the full image will show. This works great for giving close ups of your item in your catalog view. It also makes things easier for people to see what your image is in Treasury views. For my work it is nice for people to see the details involved.

I hope that my 1/2 cup of coffee explanation was clear! I'll be back tomorrow. Until then, please leave comments and be sure to share this blog with your friends! My goal for this year is to hit 1000 blog readers by June 1st!

Tuesday, October 2, 2012

Fine Tune Your Etsy Listing


Some of you may have already noticed that when you preview a listing before publishing you now have the ability to tweak your listing photo. You can now crop the image so that you have control over how it looks in the search view as well as anywhere else that the image is shown on Etsy.

As you can see above, it only changes the small block view. It does not change any of your photos in your listing. This is really great for making sure your image is "Treasury Worthy." It also gives you the ability to make sure your image shows the important details of your listing.

Etsy is always looking to improve your chance to sell an item. Sometimes it may not seem like it, but then one of these little changes comes along that makes everyone's life a little easier.

Thanks for reading. If you think this blog is helpful share it on Twitter or send a link to a friend through email. If you have any questions please email me at MarketMyShop@gmail.com

Wednesday, March 28, 2012

Tips For Reaching More Customers On Etsy


We would all like to increase our sales. It all comes down to putting your product in front of the right people. I have come up with a few tips for you that will help you do just that.

1. Make sure your photos depict your item. Do not use overly busy back grounds. Make sure your first photo is front page treasury material.

2. Make sure your title contains the keywords near the beginning of the title. Etsy puts weight on the first three words. Limit your titles to five or six words. Long titles can turn people off.

3. When describing your items make sure to use a lot of key words. Etsy does not weigh the descriptions but the search engines do.

4. Use keyword phrases in your tags. Single word tags do not generally do as well as descriptive phrases.

5. List and Renew items during peak hours. I find between 9am and 4pm Tuesday through Thursday are my peak hours. Check your stats to see when you are getting the most views.

6. If you have a lot of items to list or renew spread them out throughout the day. Renewed items and newly listed items are shown many places on Etsy. Take advantage of that.

7. Tag for holidays and special events.

8. Be sure to Tweet and or list new items on Facebook.

9. Tweet about your item at different times during the day. People look at Twitter at different times. Same goes for Facebook. Not everyone will see your posts at the same time. The more people looking at your Facebook or Twitter means more opportunities at different times. Try not to be too spammy.

10. Start over at number one and do it all over again tomorrow!

I hope this helps a little. If you have any questions please feel free to e-mail me at MarketMyShop@gmail.com The tips listed above are all topics I have covered in greater detail. Just search the blog or use the tag cloud to the right to find articles that explain things in greater detail.

Monday, September 26, 2011

Etsy Surprise Etsy Search Ads


By now most of you know the surprise, Etsy is launching their new Search Ads. More than likely you have already signed up but is your shop ready? Are your pictures perfect? Is your title relevant? Are your tags good? Are your descriptions informative and engaging? It is never too late.

The first thing people will see in your new ad is your picture. If you do nothing else, make sure your first picture is a great one. Make sure it is clear and easy to tell what it is. Make sure the background isn't too busy and distracting. Make it look like the pictures you see in front page treasuries on Etsy.

Though it hasn't been said, I am guessing that the title will at least partially show up under the picture in the ad like regular in search. make sure that your first three words are accurate for your image and contain relevant key words. You probably already have done this when you were optimizing but check to make sure.

Your tags are going to be used to decide when to place your ad. Make sure your keywords are ones that would cause customers to find you anyway. This will help with items that have a lot of competition like Steampunk jewelry. Etsy created a list of keywords that are searched a lot and made a list along with a description of how pricing plays into it. Search Ad Keyword Pricing It might be a good idea to look at this list for ideas on keywords. I know I did.

Lastly, the description is what is going to convert your lookers into your buyers. Describe the item. Describe the shape, the feel, the measurements, how it works, how it was created and how it will make your customer feel. That is right, describe the emotional response your customers will have by putting it on, using it, looking at it, smelling it, etc. That is the way to sell the item, describe why they need it.

I know this is a lot to take in on a Monday morning. It was a lot to write! As always please let me know if you have questions or comments either here or via email at MarketMyShop@gmail.com

I am starting to get the website together but it is not even to a point of uploading yet. I will let you all know when it is done. Hopefully before the Holidays.

Tuesday, September 20, 2011

How To Take Better Pictures


"How do I take better pictures?" That is the second most asked question I get. The answer is simple, I really don't know. I am not a photographer. In fact I could not even define some of the most simple photographic terms if my life depended on it. Fortunately I have the Internet.

My photographer was recently out of town for a week. I needed some pictures to list some new items. I called my sister and asked to borrow one of her cameras. She has five kids, so I knew she had at least one camera. She loaned me two. One was some type of Sony and the other was an Olympus.

I know about how to set up a light box and how to light things by watching my photographer work.(This post about Photography can be helpful to you as well) I always wondered what she was doing with all the knob turning and changing settings and such. Now was the time for me to learn all about that.

The very first thing I did was search for a tutorial on the camera I was using. Now, I didn't look up just any kind of tutorial, I got really specific in my search. I searched for "How to take closeup pictures of jewelry with the Olympus model number." It turns out that several people had taken the time to talk about how to set the camera for great pics. I did not even have to read the owners manual.

Now, my lighting wasn't perfect so I had to figure out how to fix that after the fact. I am very fortunate to own a copy of Photoshop CS4 and I do know my way around some of it. I searched on the Internet for "Ways to lighten a photo in Photoshop CS4." Yes, you guessed it, there were tutorials galore. Now, I will say that some of the tutorials on Photoshop were too far advanced for me to have a clue what they were talking about but after looking through a few articles I found what I was looking for.

I realize that most people cannot afford a high dollar camera or expensive photo editing tools. You can make the best of what you have. Photoshop Elements is a great program that costs a fraction of what Photoshop will cost you. You can also try out some really great FREE open source photo editing software. Gimp is a great open source program much like Photoshop, in fact, you can use the add on for it that makes it even more like Photoshop. There is a bit of a learning curve with it. Fortunately there are tutorials galore.

Using a 10 mega pixel or better camera makes a lot of difference. You can buy a camera for under $100 that will shoot great pictures. Just make sure it has a Macro setting. That is what helps you take close up pictures. Around Christmas time, especially Black Friday, is a great time to pick up a good camera. You can get a $200 for under $100 sometimes. Just do a little research and look for tutorials on the exact camera model before buying one.

I hope this has been helpful to you. Let me know what kind of camera you use for your pictures and what kind of experience you have had with them.

Tuesday, August 16, 2011

Photography For Your Handmade Or Vintage Shop

Chainmail Star Pendant by Tangled Metal
If a picture is worth a thousand words, you have an extra few thousand words you can add to your listing in your online shop. Whether you are selling handmade goods or vintage items or supplies your pictures are a very important part of your shop. I talked about keywords and titles earlier and that is how you get your listings found in the searches. Photos are how you get the person to click through to your items.

Since people cannot touch your product you must make sure to have good photos. When you are taking photos try to imagine yourself looking over an object. What do you look at when you are trying to decide if you want to buy something or not? If it has a clasp is it strong enough, if it is a vintage items does it have a makers mark, if it is a supply what size is it in reference to a coin? You have to answer these questions in a photo.

Mini Studio In A Box $83.32
It all starts with a light box, camera and a tripod- or at least for smaller items it should. Light boxes range in price from the homemade free to the professional ones that cost several thousand dollars. Personally I use one that I made from a cardboard box and an old white sheet. I am working on a tutorial on how to make your own light box and will have that up soon.

The photo box to the left is very affordable since it comes with lights and a tripod. I have actually seen this one in person and it is a good economical choice. It is great because it folds up so it can be stored when not in use.

In my home made light box I use four lights to make sure to wash out as many shadows as possible. I like a stark white background, so does the Etsy front page. *hint, hint* Some people are really good at using props to tell a story. Be cautious not to pull the story away from your item.

Some tips for you:

1.) If your photo is blurry you are better off without a photo at all. If you can't focus on it with your camera, research the settings available and try again. Or buy a better camera.

2.) If you have a busy background that detracts from your item it is as bad as having a blurry photo. Props are great but don't go overboard. Remember the focus is your item not your props.

3.) If your item is something like earrings or a bathing suit you may not want to show it on a model. I know that sounds weird but a lot of people have issues with wearing something that has come into contact with certain parts of the body.

That is it for today. Be sure to share this info with everyone you know that might benefit from it. If you have any questions please do not hesitate to ask.